![]()
![]()
|
|
|
You can use this tool to create the rooms displayed in the Space Allocation Wizard window in Allplan and to place them in the drawing file.
When you open a space allocation plan (list) that you have exported to and modified in an external program, the existing rooms are updated (provided you create the rooms in the same drawing file).
Note: You can export up to 150 rooms from the Space Allocation Wizard to Allplan. The easiest way to handle large space allocation plans is to split them up in MS Excel and to export the individual parts to different drawing files.
To create rooms from a space allocation plan in drawing files
On the File menu, click Create rooms in drawing file.
The Space Allocation Wizard closes and the room or room block is attached to the crosshairs.
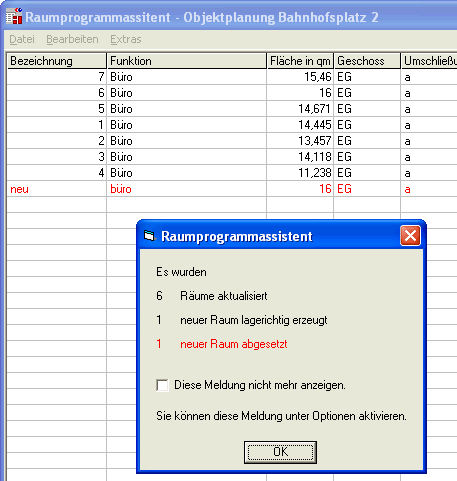
Depending on the setting in the Options, the system now displays an update report providing information on the number and type of rooms placed.
Note: You cannot use Allplan's ![]() Undo and
Undo and ![]() Redo tools to undo or restore elements created with the Space Allocation Wizard.
Redo tools to undo or restore elements created with the Space Allocation Wizard.
Note: Activate another drawing file if you want to place the space allocation plan again in a different drawing file.
| (C) Allplan GmbH | Privacy policy |
