Header
 Module(s): Frame Construction: Rafters, Roof Beams, Posts
You can use the  Header tool to apply headers to rafters, rafter-supporting purlins, beams, collar beams or collar ties.
To create a header
- Click Header (How).
- If you want, you can now modify the header parameters.
Use one of the following provided on the Context toolbar. - Click the rafter (beam etc.) in which you want to insert the header.
- Specify in the Input options how the height of the header is to be entered.
You have the following options:- Spacng
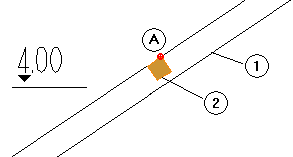
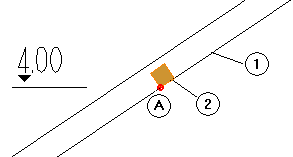
The point clicked defines the start of the header (in plan); you can change the value in the dialog line. By changing the reference point, you can define the position of the header more accurately.
The value you enter for the offset defines the clear spacing to the nearest edge of the header; you can specify whether the offset is to be based on the top or bottom of the header using the offset direction.
Click in the workspace.
Example - Top
Enter the height of the top of the header in the dialog line or click a point in elevation or isometric view.
The header is always flush with the . The program does not prompt for the offset direction as the header is automatically applied downward. - Bottom
Enter the height of the bottom of the header in the dialog line or click a point in elevation or isometric view.
The header is always flush with the . The program does not prompt for the offset direction as the header is automatically applied upward.
- Place a point to define the end of the header.
Click the relevant rafter (beam etc.). - Press ESC to quit the tool.
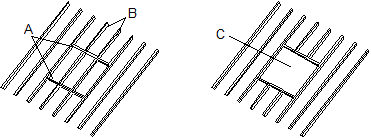
(A) Header
(B) Rafters intersected by header are divided into three segments
(C) 'Hole' after you have deleted the rafter sections within the header
Note: At least 2 rafters (beams etc.) are required to create a header.