General settings
Renderer
Select the renderer. You can choose between Standard, Physical and Redshift here.
Note: The Redshift renderer is only available in the ALLPLAN Professional packages or higher.
The physical renderer calculates many scenes better and/or quicker than the standard renderer. Problems that might occur with Standard, such as Moiré effects for tiled textures, do not occur with the Physical version. Redshift is a high-performance renderer from Maxon, which generally provides the quickest and best results. Furthermore, there are also advanced camera settings for Redshift (stereo-spherical and fish-eye).
Tip: Results can vary depending on the model and scenery. So, do some trial runs with reduced settings to find out which renderer works best for you.
Rendering mode
Rendering method used to calculate the image.
You can choose between the rendering methods GI {...} (global illumination) and No GI (without global illumination).
Rendering without global Illumination produces results in less time and is therefore eminently suitable for quick sample renderings. Shining lights and sharp edges of shadows are clearly visible. However, it is not possible to assess lights, colors, color gradients or shadows.
For rendering methods with global illumination GI {...} you can determine the primary and secondary rendering methods. With the standard and physical renderers, these are:
With Redshift renderer, they are as follows:
Ambient occlusion
Only if the Standard or Physical setting is selected for Renderer.
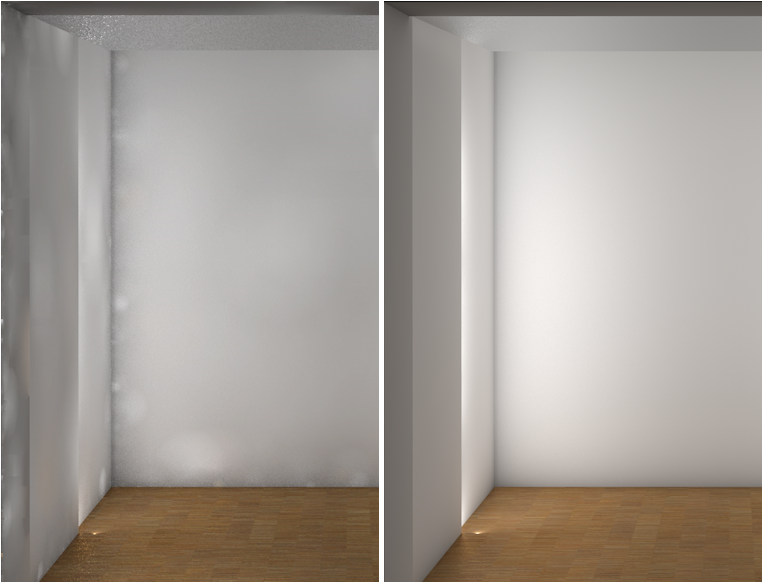
La oclusión ambiental es una técnica de sombreado que puedes usar junto con la iluminación global. La oclusión del ambiente genera sombras realistas en un periodo de tiempo relativamente corto. Otra ventaja de esta técnica que es enfatiza los detalles aplicando las sombras a los bordes y esquinas.
Por ejemplo, puedes usar la oclusión ambiental para simular las condiciones de iluminación cuando el cielo está nublado y no hay luz del sol directa. Puedes usar esta técnica para acotar tanto las escenas interiores como las exteriores.
When you select this option, you can define additional AO parameters in the Advanced settings palette.
Example of rendered image with and without the Ambient occlusion option:
Options
Only if the Standard or Physical setting is selected for Renderer.
By using the Options palette, you can achieve visual effects and include surface elements in the rendered images.
Plano virtual del terreno
Solo si has definido un plano virtual del terreno con el![]() Entorno.
Entorno.
Determina si el plano virtual del terreno se ve en la imagen renderizada.
Si seleccionas esta opción, Allplan incluirá el plano virtual del terreno en la imagen renderizada. De lo contrario, se excluirá.
Optimize for
Only if the Standard or Physical setting is selected for Renderer.
Optimizes the calculation for exterior views (with natural lighting) or interior views (with artificial lighting and difficult lighting conditions).
This setting is directly affected by the Samples accuracy setting in the Irradiance cache area (see Advanced settings palette).
GI Gamma
Only if the Standard or Physical setting is selected for Renderer.
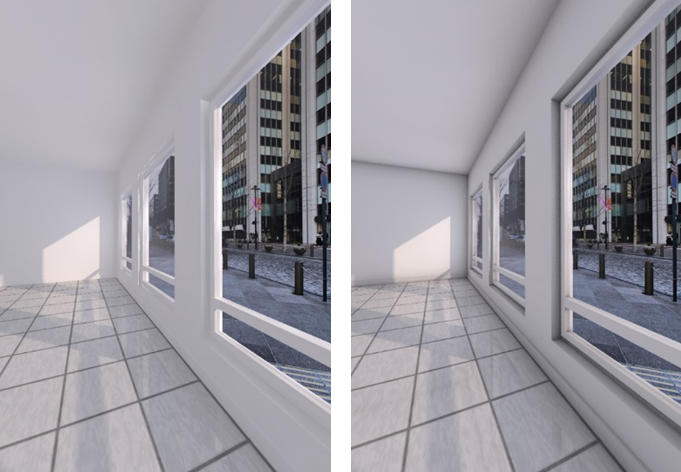
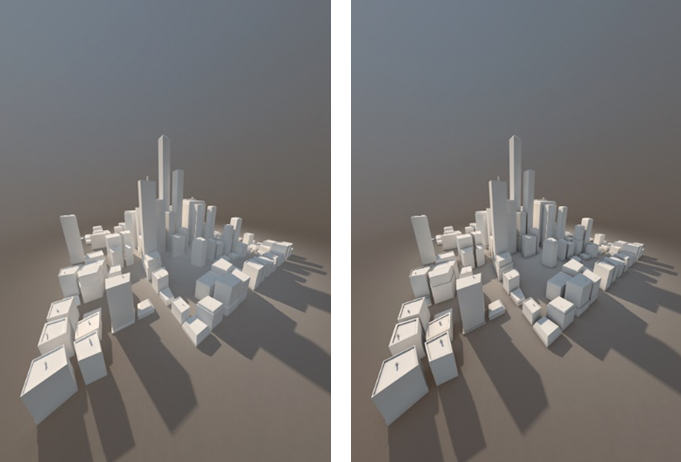
The gamma value of "Global Illumination" controls the brightness of the entire scene in the rendering result.
By using this value, you can brighten up dark images or darken overexposed images. Dark images result from small values for Diffuse depth (see Advanced settings palette).
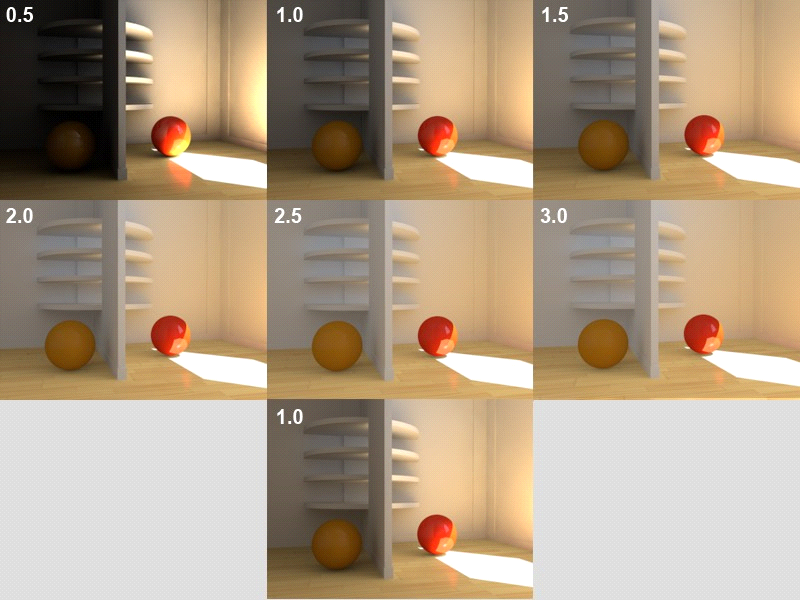
Examples of rendered images with different settings for global illumination (= gamma value):
quality
Default
You can select one of the predefined quality levels for the rendered image. Remember: The better the quality, the longer the calculation will take.
Use the Advanced settings area to customize the settings for the quality levels.
Advanced Settings
Opens the Advanced settings palette, where you can define advanced rendering settings, thus controlling the quality of the resulting image.
Camera settings
Spherical
Only if the Standard or Physical setting is selected for Renderer.
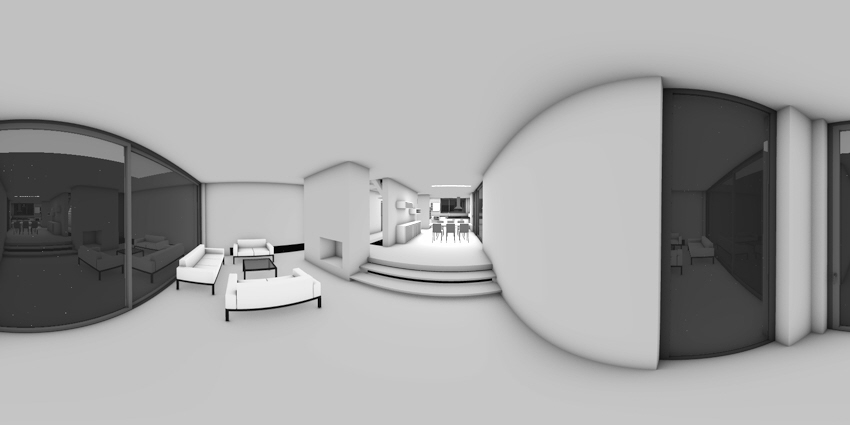
Select this option to render spherical panoramas (see "Creating 360° views").
ALLPLAN uses the equirectangular projection for the perspective.
Important!
So that ALLPLAN displays spherical panoramas correctly, you must select the image resolution so that it is at a ratio of 2:1 (for example, 4,000 x 2,000 pixels). In addition, you must select the Latitude, longitude option for the Mode and save the rendered image in JPG or TIF format.
Mode
Only if, under Renderer , the standard or physical setting has been selected and the spherical option has been activated.
Definition of the mapping mode:
Camera type / Exposure
Only if, for Renderer , the redshift setting is selected.
Selection of the lens for additional visual effects:
Under Exposure the exposure time can be varied between -2 and 2.
|
(C) ALLPLAN GmbH |
Política de privacidad |