![]()
![]()
|
|
|
![]() Task area Dimension
Task area Dimension
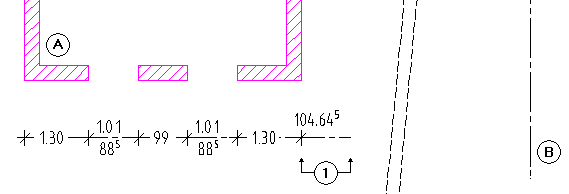
You can use this tool to create axis-based dimension lines.
Note: This tool is particularly useful for dimensioning elements which are so far from the reference line that this line is no longer visible in the layout. The dimension line projects toward the reference line by the value you define for Projection for reference line dimensioning in the ![]() Options - Dimension Line page - Display area.
Options - Dimension Line page - Display area.
The projection and offset value apply to the point that is closest to the reference line.
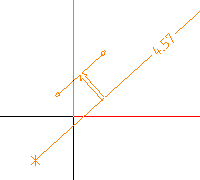
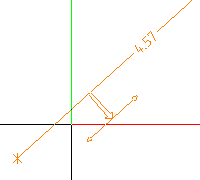
To create a dimension line based on a reference line
Tip: To ensure exact dimensions, click genuine points only. You cannot hear an acoustic signal when you click a genuine point.
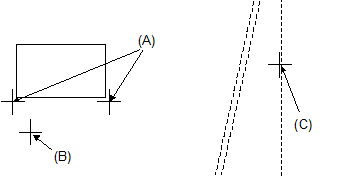
(A) Points to be dimensioned
(B) Position of dimension line
(C) Existing reference line (can be outside)
|
(C) ALLPLAN GmbH |
Privacy policy |