![]() Tools: Render
Tools: Render
Image resolution
Estándar
Puedes seleccionar unas de las resoluciones predeterminadas, definiendo así el tamaño de la imagen generada.
Note: The resolution is also used by the ![]() Record Movie tool.
Record Movie tool.
Resolution
By using the Render size palette, you can select a resolution that differs from the Default resolution. This value defines the size of the rendered image.
General settings
Renderer
Select the renderer. You can choose between Standard and Physical.
The Physical renderer is better and faster when it comes to calculating some images, preventing problems that may occur with the Standard renderer, such as Moiré effects.
Results can vary depending on the model. So you should do some trial runs to find out which renderer works best for you.
Rendering mode
Rendering method used to calculate the image.
You can choose between the rendering methods GI (global illumination) and No GI. Using GI, you can define the primary and secondary methods.
Tip: The GI {IR + QMC} method calculates shadows more precisely. If shadows are very important for your scene, you can also render interior views with this method. However, calculation may take a little longer.
If the resulting image is distorted, you can compensate for this by increasing the quality (see Quality - Default) and optimizing the image for interior views (see Optimize for).
Options
Using the Options palette, you can achieve visual effects and include surface elements in the rendered images.
Alpha channel
When you select this option, the program masks the background of the image with an alpha channel. In other words, the program cuts out a background color or bitmap when calculating the image.
This is necessary if you want to place the rendered, transparent image on top of a different background (alpha blending).
Virtual ground plane
Only if you have defined a virtual ground plane using ![]() Surroundings.
Surroundings.
Specifies whether the virtual ground plane is displayed in the rendered image.
If you select this option, Allplan will include the virtual ground plane in the rendered image. Otherwise, it will be excluded.
Optimize for
Optimizes the calculation for exterior views (with natural lighting) or interior views (with artificial lighting and difficult lighting conditions).
This setting is directly affected by the Samples accuracy setting in the Irradiance cache area (see Advanced settings palette).
Global illumination
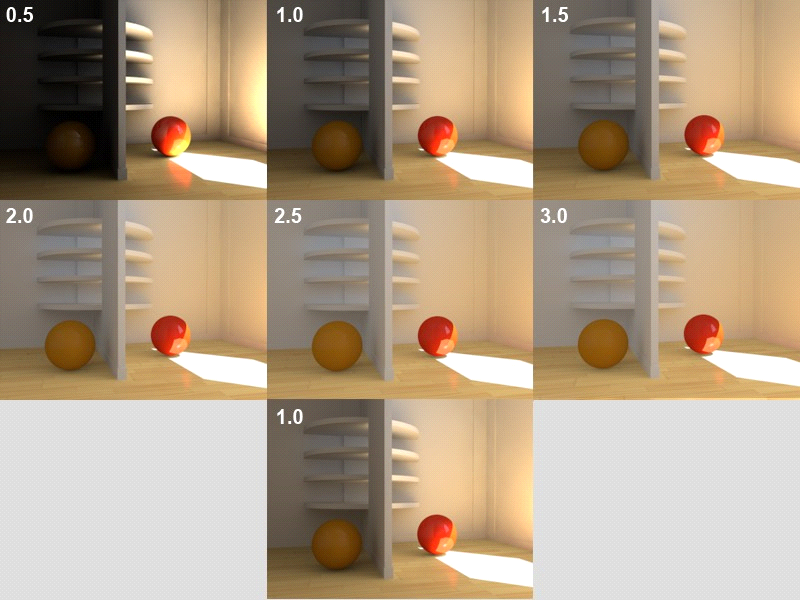
Controls the gamma value and thus the brightness of the entire scene in the resulting image.
Using this value, you can brighten up dark images or darken overexposed images. Dark images result from small values for Diffuse depth (see Advanced settings palette).
Examples of rendered images with different settings for global illumination (= gamma value):
Quality
Default
You can select one of the predefined quality levels for the rendered image. Remember: The better the quality, the longer the calculation will take.
Using Advanced settings, you can customize the settings for the quality levels to suit your needs.
Advanced settings
Opens the Advanced settings palette, where you can define advanced rendering settings, thus controlling the quality of the resulting image.
Effects
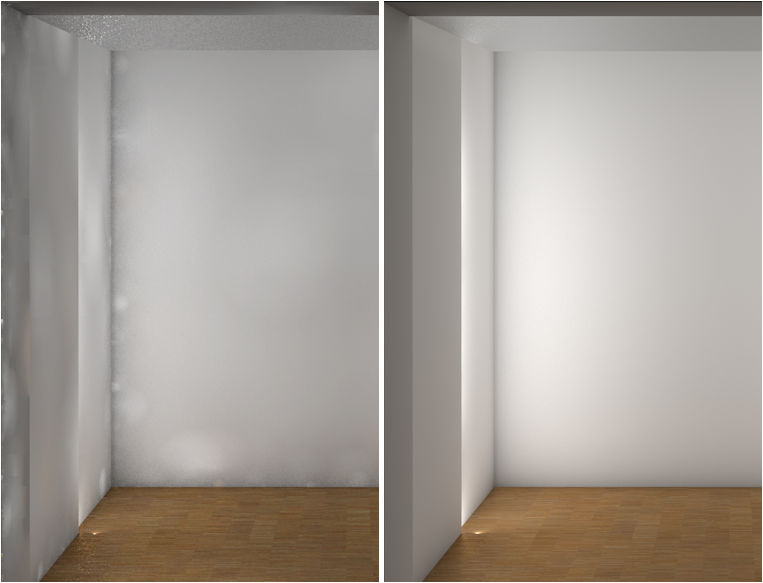
Ambient occlusion
Ambient occlusion is a shading technique you can use together with global illumination. Ambient occlusion produces realistic shadows in a relatively short period of time. Another advantage of this technique is that it emphasizes details by applying shadows to edges and corners.
For example, you can use ambient occlusion to simulate lighting conditions when the sky is cloudy and there is no direct sunlight. You can use this technique both for interior scenes and exterior scenes.
When you select this option, you can define additional AO parameters in the Advanced settings palette.
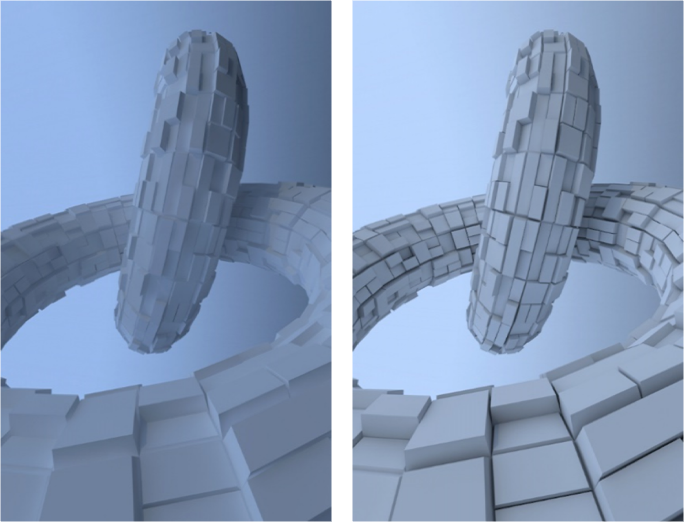
Example of rendered image with and without the Ambient occlusion option:
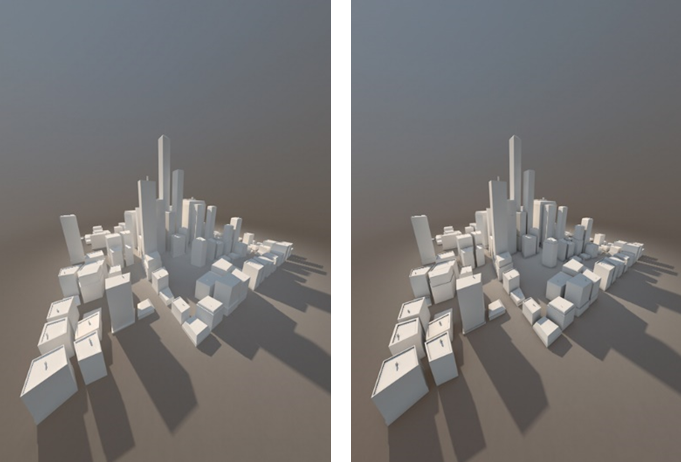
Bloom / Intensity
When Blooming is switched on, an additional ring of light is placed around light sources, such as the sun or point-shaped sources of light. The prerequisite is therefore that the physical sky has been selected as the background via ![]() surroundings (select) or one or more artificial light sources have been set via
surroundings (select) or one or more artificial light sources have been set via ![]() set project light (select).
set project light (select).
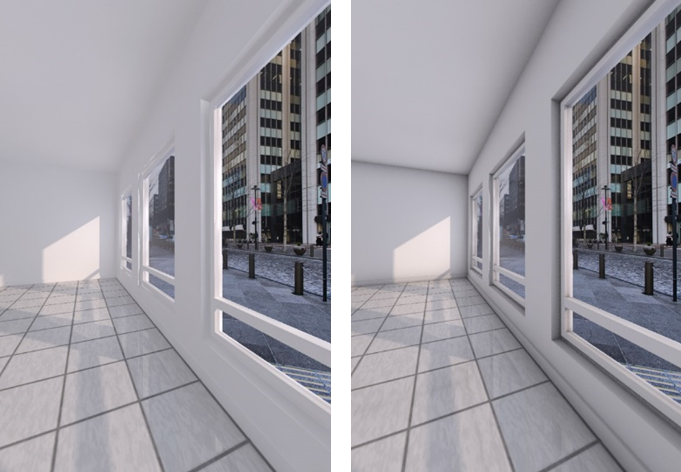
Lense effect / Intensity
When the lens effect is switched on, additional circular light reflections (comparable to the reflection of a light source in a camera lens) are interspersed in the image.
Tone mapping / Gamma / ISO
You can readjust over/underexposed areas by reducing the dynamic range.
When you render scenes with great differences in brightness, such as scenes that contain both bright areas illuminated directly and shaded areas, you can thus reproduce the full range of light intensities present in natural scenes by reducing the dynamic range.
This is controlled via gamma correction (0 - 10) and light sensitivity (ISO value).
Camera settings
Spherical
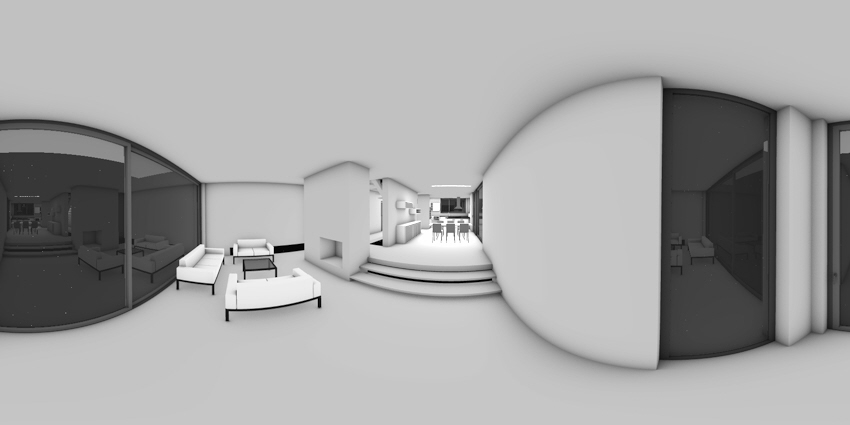
Select this option to render spherical panoramas (see "Creating 360° views").
Allplan uses the equirectangular projection for the perspective view.
Important!
So that Allplan displays spherical panoramas correctly, you must select the image resolution so that it is at a ratio of 2:1 (for example, 4,000 x 2,000 pixels). In addition, you must select the Latitude, longitude option for the Mode and save the rendered image in JPG or TIF format.
Mode
Only if the Spherical option is selected
Definition of the mapping mode:
| (C) ALLPLAN GmbH | Datenschutzbestimmungen |