![]()
![]()
|
|
|
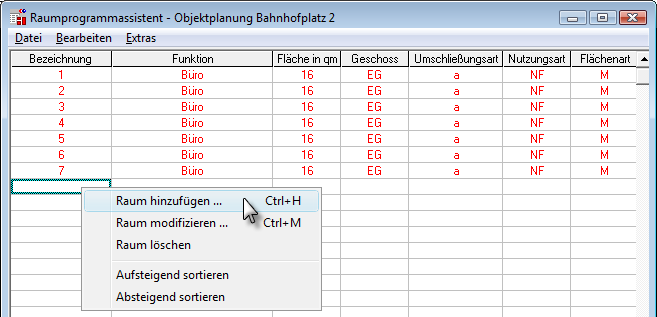
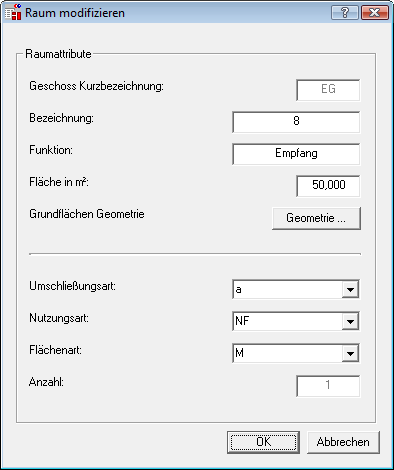
How to use the space allocation wizard
Tip: You can define the height of the default reference planes using the ![]() List Default Planes tool or in the plane model of the building structure.
List Default Planes tool or in the plane model of the building structure.
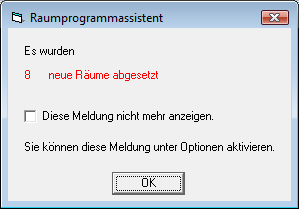
The program informs you of the type and number of rooms placed.
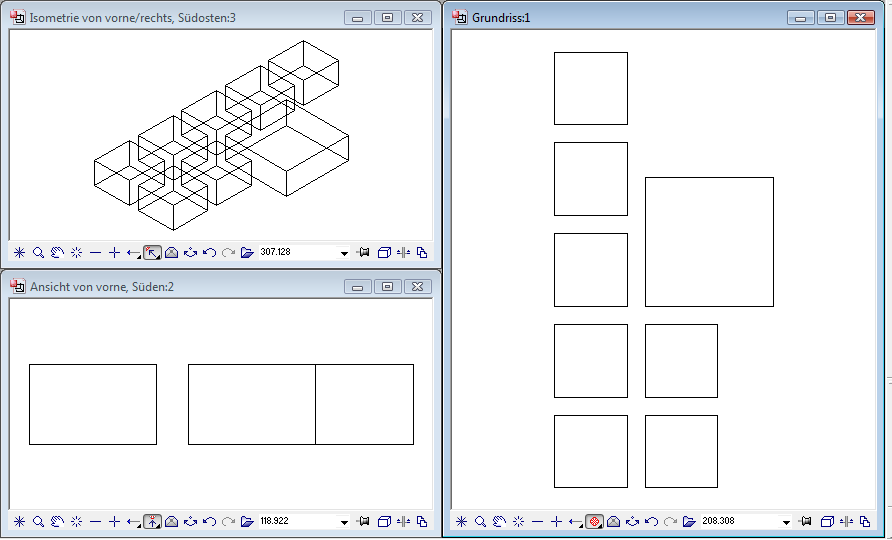
The result might look like this:
Note: You cannot use Allplan's ![]() Undo and
Undo and ![]() Redo tools to undo or restore elements created with the Space Allocation Wizard.
Redo tools to undo or restore elements created with the Space Allocation Wizard.
Note: You can export up to 150 rooms from the Space Allocation Wizard to Allplan. The easiest way to handle large space allocation plans is to split them up in MS Excel and to export the individual parts to different drawing files.
Tip: You can use Read rooms from drawing file (File menu) to transfer all the rooms in the current drawing file to the Space Allocation Wizard window. These rooms can then be saved as a xls file or txt file using Save or Save as... (File menu). You can change this file in an external program (MS Excel or editor). When you open a file modified in this manner and import it to the same drawing file using Create rooms in drawing file (File menu), the program does not create new rooms. Rather, the existing rooms are updated.
| (C) Allplan GmbH | Privacy policy |
