Contents

Index

Handrail with curved start / end

Tool(s): Railing

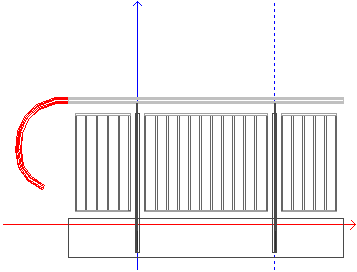
To apply a curved start / end to a railing

  1. Start by drawing the curved part as a 2D polyline:

    vorb

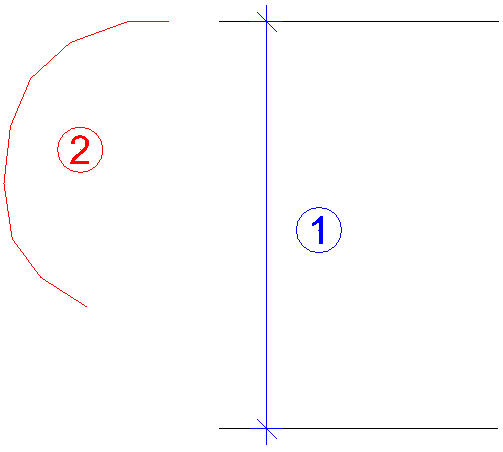
    1 - height of handrail
    2 - polyline, curved part

  2. Click Railing.
  3. Click Modify railing.
  4. Click the railing to which you want to add the curved part of the handrail.
  5. Click Railing properties.
  6. In the element list, select the railing to which you want to add the curved part.
  7. In the Element area, click Copy element.
  8. Define the element type by clicking Vertical.
  9. In the Path area, click pfad_holen Get path.
  10. Click the path (2D polyline).
  11. In the Path area, select the Active option.

    step1

  12. In the Position, length (mm) area, enter the height of the handrail in the Z offset box: 900, for example.

    step2

  13. In the Division style (mm) area, click Offset and enter 9999999999999.
  14. Select the Fix check box beside Offset at start.

    step3

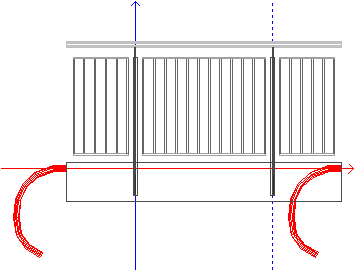
    The result in the elevation preview might look like this:

    ready

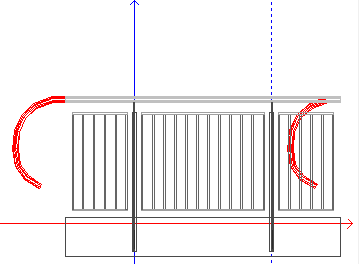
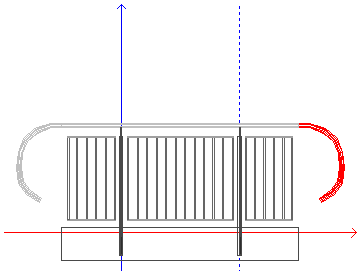
    To add the same curved part to the end of the handrail, do the following:

  15. In the Element area, click Copy element again.
  16. In the Division style (mm) area, select the Fix check box beside Offset end.
  17. In the Path area, click Modify path.
  18. In the Path Preview dialog box, click Mirror path.
  19. Click OK to confirm the Path Preview dialog box.

    ready2

  20. Click OK to confirm the Railing Properties dialog box.
  21. Click Apply to apply the changes.


Allplan 2016
(C) Allplan GmbH Privacy policy