Enter Area Load
 Tool(s): Special Loads
You can use  Enter Area Load to create area loads.
To create an area load
- Click
 Special Loads (How).
 - Select the required load case by clicking
 Define Load Case.
 - Click Enter Area Load on the Special Loads Context toolbar.
- In the input options, click DefPln (abnormal load in default plane) or Design (abnormal load on design). When you select DefPln, you must place the load on the upper default plane. When you select Design, you must place the load on the structure (for example, on the sloping roof surface).
Note:
You can define the default planes using the List Default Planes tool in the Annotations task area. - Click Area Load Pz on the Area Load Context toolbar. Enter the load in [kN/m²].
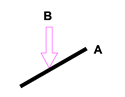
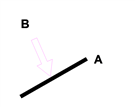
- Click Perpendicular to roof plane or Vertical to roof plane on the context toolbar to define the of a wind load acting as an area load on a roof area.
- You can also use
 Match existing area loads.
 - Place the corner points one after the other. To close the outline, press ESC after you have entered the next to last point.
- Click Cancel to finish entering area loads.