![]()
![]()
|
|
|
The following is a brief description of how to set up an Allplan workgroup on your network. Detailed instructions can be found in the services application Help under the keyword "workgroup manager".
How to select the workgroup manager
To do this, start Allplan 2023 and click Allplan Diagnostics in the ![]() Help menu.
Help menu.
Or:
To do this, start < N_CurVer> and click Allplan Diagnostics in the Service menu.
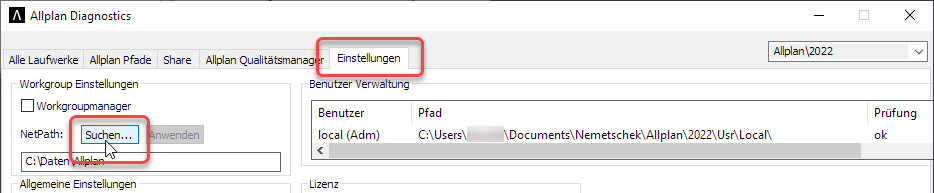
To do this, click on the folder shared with the intended users for central file storage under \\computer name.
This will automatically copy the UNC path to the path specification text box in the format \\computer name\...\Central File Storage Folder.
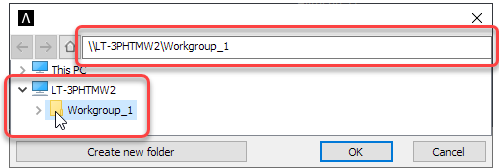
Note: If the Central File Storage Folder is not displayed under \\computer name, then the folder has not been shared. In this case, close Allplan Diagnostics, release the folder and start again from step 1.
Please note! Even if the central file storage folder is located locally on the same computer, the path must be specified as a UNC address in this way.
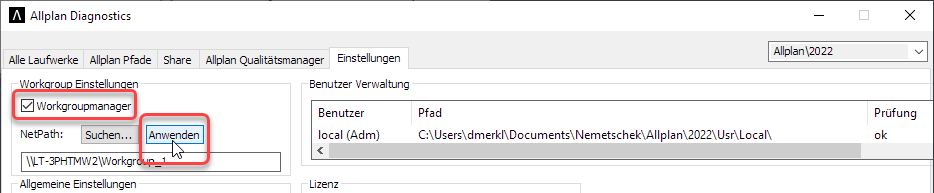
Now the workgroup manager is selected. Close the NetManager log, if it is open.
Note: For more information on Allplan Diagnostics, see Allplan Help. Just press the F1 key or click Help in the lower left corner.
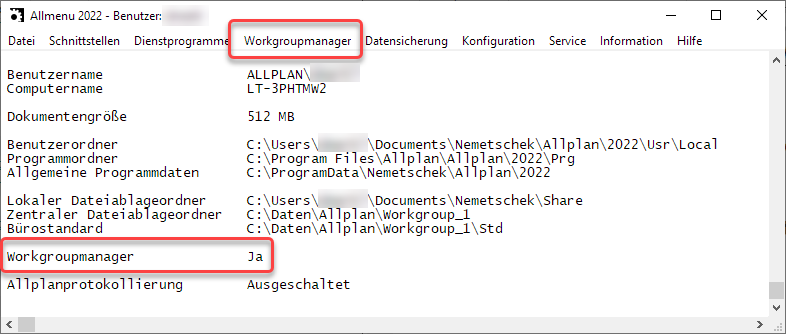
Services application now also contains the workgroup manager menu.
How to set up an Allplan Workgroup
To do this, click Administer projects and computer in the Workgroup manager menu.
To do this, click Administer users in the Workgroup manager menu.
Please note! Make sure that the Allplan usernames you assign are in compliance with ISO 9660.
Note: For more information about the workgroup manager, see Services application Help. Just click Help in the Help menu.
Note: When a user logs on to the operating system with his user name, he is automatically logged on to Allplan 2023 as a user with the same name or as a user set up in the workgroup manager.
|
(C) ALLPLAN GmbH |
Privacy policy |