![]() Tool(s): Clipping Path
Tool(s): Clipping Path
To define a vertical section
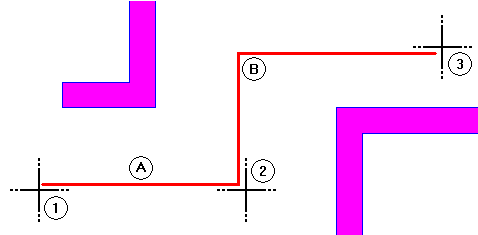
Note: To achieve right-angular bends, enter the end point of the next section of the clipping line. Allplan then adds the right-angular bend automatically. If the end point of the next section is perpendicular to the existing clipping line, Allplan tells you that this is an Illegal point.
Example
Note: The label and clipping line symbols can be moved independently of each other.
Tip: You can change the clipping line using ![]() Stretch Entities. This is only possible if you have selected the Section object option in the Create Clipping Path palette. You can use handles to modify the section object and the entire clipping path.
Stretch Entities. This is only possible if you have selected the Section object option in the Create Clipping Path palette. You can use handles to modify the section object and the entire clipping path.
Tip: You can modify the clipping path by selecting ![]() Modify Clipping Path or Properties on the shortcut menu.
Modify Clipping Path or Properties on the shortcut menu.
|
(C) ALLPLAN GmbH |
Privacy policy |