![]()
![]()
|
|
|
Whenever you click a tool which expects you to enter points, you can see the following boxes and icons in the dialog line:

You can also find the z-direction wherever the third dimension is required, for example in Modeling:

Preview snaps to points
You can snap points and place them by using the mouse. You can also enter points and elements based on existing points:
Point to a point and the program will snap to it and mark it with a red X.
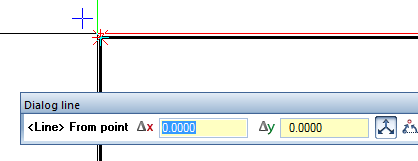
Figure: Point snapped; highlighted by a red X
Note: Points snapped are visible in all views.
All the entries you make in the dialog line apply to the point snapped. Use the Tab or Page up key or Shift+Tab or Page down key to switch between the boxes. You can also calculate.
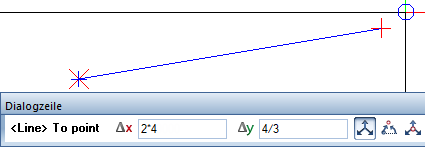
Figure: calculations: DX=4x2=8; DY=4/3=1.333
Preview shows all points
The preview simultaneously displays the entries you make in the dialog line. A red cross immediately appears at the point defined by the values entered.
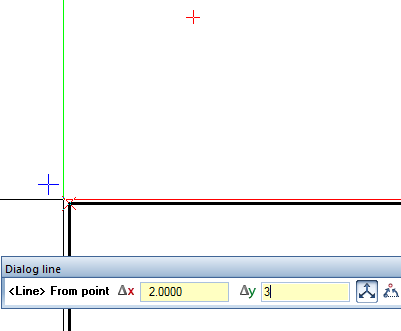
Figure: Preview of point, offset of dx = 2, dy = 3 to point snapped
When you select the Enter key or click in the workspace, the point you have just entered serves as the starting point for the new element (line in this example) or as the reference point for modification tools.
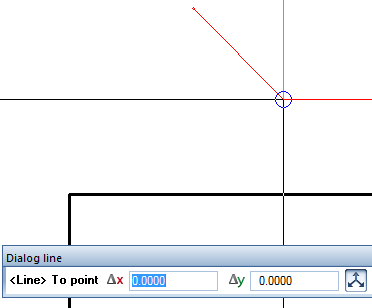
Figure: Select the Enter key or click in the workspace to place the point; the line is attached to the crosshairs.
Before you place the point, you can also point to another point: the offset you enter in the dialog line refers to the new point snapped.
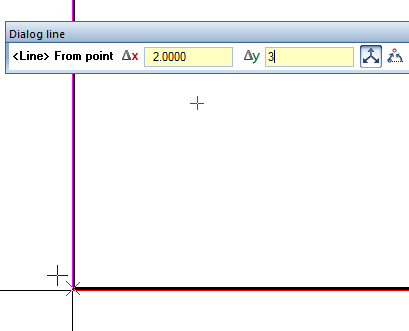
Figure: Preview of point, offset of dx = 2, dy = 3 refers to new point
Reference to point snapped or point placed?
When making entries in the dialog line, you can see at once whether your entries refer to a point snapped or to the point you placed last:
Value entered is proposed
The icons to the left of the boxes are buttons:
When you click an icon, the program proposes the value entered for all further steps; however, you can change the value any time.
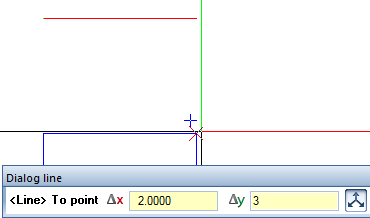
Figure: dy = 3 is proposed for the next point snapped
Transferring values to boxes by clicking
Boxes provide shortcut menus, which you can use to get values from the drawing by clicking. Right-click the relevant box, select a tool and click the points or angles you want to use.
Tool |
Use |
|
Horizontal offset |
|
Vertical offset |
|
Offset |
|
Angle |
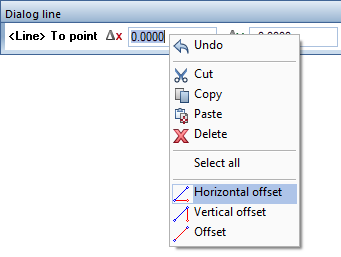
Figure: Shortcut menu when entering coordinates
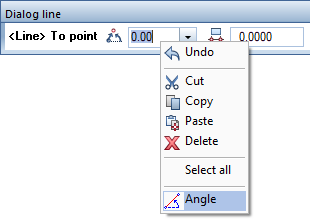
Figure: Shortcut menu when entering angles
|
(C) ALLPLAN GmbH |
Privacy policy |