![]()
![]()
|
|
|
Here, you can do everything using drag-and-drop operations. This way, all elements can be added to, moved within or removed from the Actionbar. Here, elements are tasks, task areas, groups of tools and individual tools.
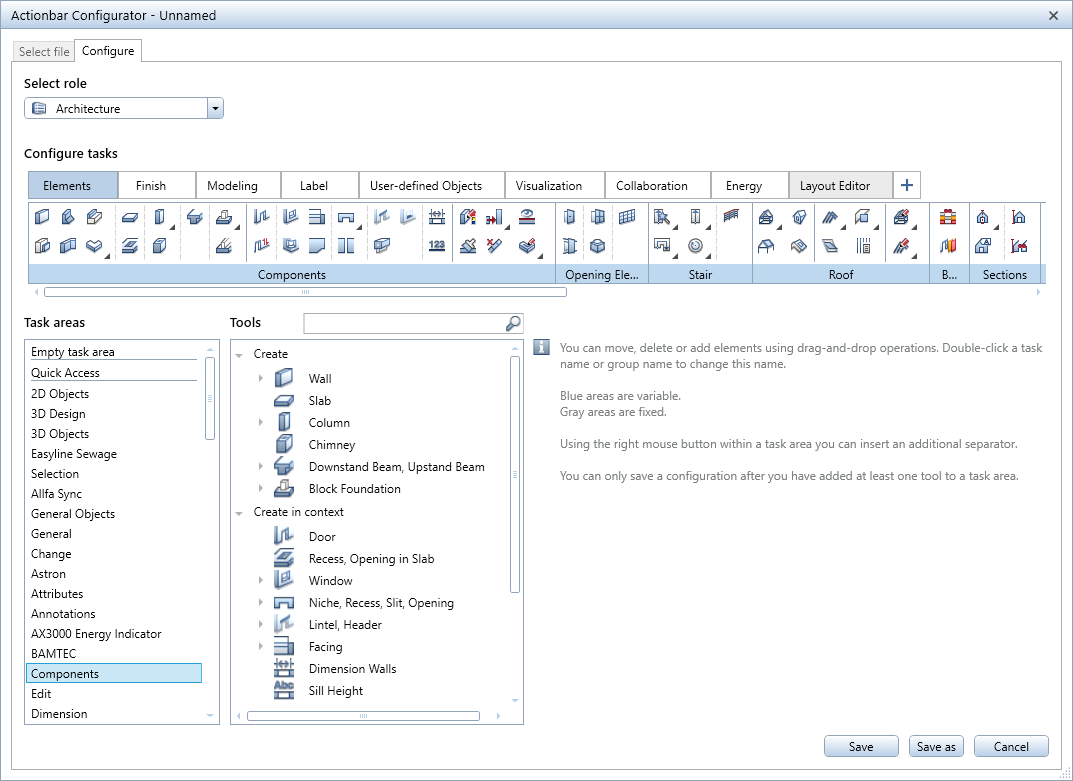
The table on the left side of Actionbar configurator lists task areas, groups of tools (Create, Create in context and Modify in context) and individual tools. Go to the table, select the task area in the left column, the group of tools or the tool (both in the right column) and drag the selected element into the Actionbar.
To add a new task to the Actionbar, click ![]() . If the Actionbar already has at least one task with fixed task areas (gray), the program uses these fixed task areas for the new task too.
. If the Actionbar already has at least one task with fixed task areas (gray), the program uses these fixed task areas for the new task too.
Of course, you can rename the tasks and task areas. To do this, double-click the name you want to change.
To move and remove elements, you can also use drag-and-drop operations:
You can also create flyout menus. To do this, left-click a tool on the Actionbar or in the right column of the table, keep the left mouse button held down and drag the icon of the tool onto another tool. Then release the mouse button. This results in a flyout menu containing the moved tool.
To clearly arrange the tools within a task area, you can add separators using the shortcut menu. When you collapse a task area, the separator ensures that the first tool (= tool at top left) remains visible whereas the other tools are on its flyout menu.

Saving Actionbar configurations
There are myriad options to customize the Actionbar to your needs. Presenting the variety of these options, however, is beyond the scope of this document. Try it out for yourself! As a result, you get an Actionbar that is perfectly tailored to suit your needs. So that you can use these settings again and again, click the Save or Save as button.
Save saves the Actionbar configuration in *.xml format to the \Usr\Local\Actionbar folder. Actionbar configurator closes and you can find the new configuration in the dropdown list of ![]() Load favorite.
Load favorite.

If you want to save the Actionbar configuration to a different folder, click the Save as button in Actionbar Configurator, select the required folder in the dialog box and click Save. Here, too, the Actionbar configuration is saved as an *.xml file.
Importing Actionbar configurations
If you want to work with Actionbar configurations that cannot be selected as favorites, because they are not in the \Usr\Local\Actionbar folder, you can use the import tool you can find on the Select file tab of Actionbar configurator. To do this, open Actionbar configurator by clicking ![]() on the right side of the Actionbar.
on the right side of the Actionbar.
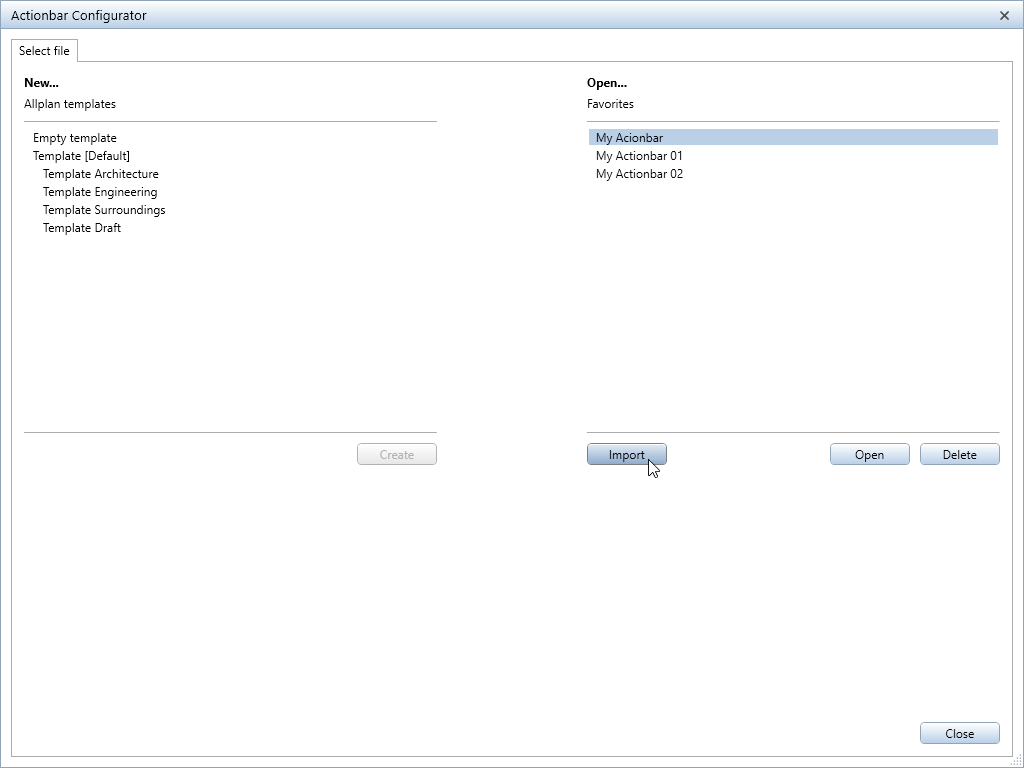
Click the Import button to open the Import Actionbar dialog box, where you can select the Actionbar configuration (*.xml file) you want to import. The Configure tab of Actionbar configurator opens, displaying the imported Actionbar. You can now customize this Actionbar to suit your needs and requirements. Finally, Save the imported Actionbar. You can then find it in the dropdown list of ![]() Load favorite.
Load favorite.
|
(C) ALLPLAN GmbH |
Privacy policy |