Redesigned layout output
You can now find completely revised versions of the  Print Layouts,
  Export HPGL File, Bitmap File and
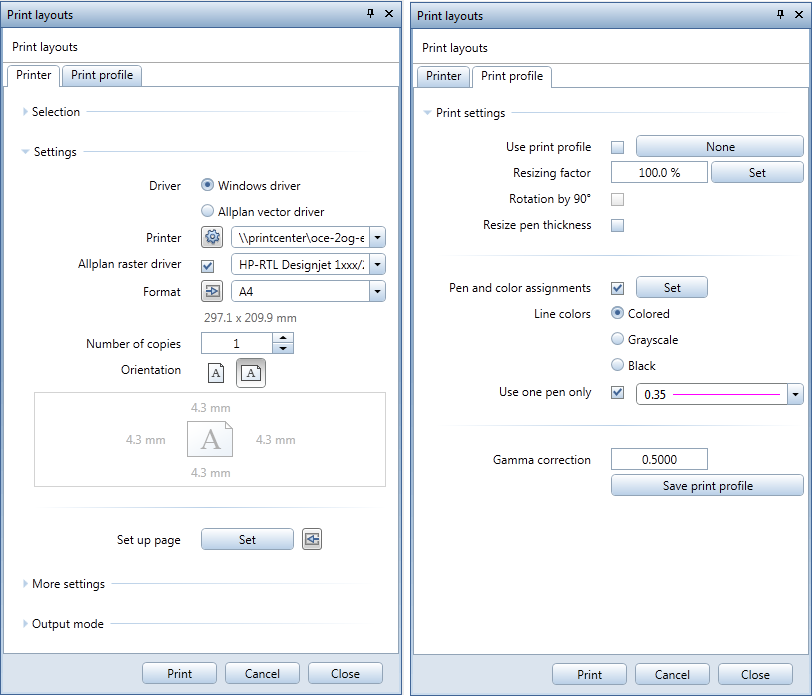
  Archiving tools, which you can use to output finished layouts. All the menus and toolbars disappear as soon as you select one of these tools. The Print Layouts palette opens and you can see the Printer tab. The representation of the layout matches that in the printout.
Any changes you make to the settings in the palette are immediately displayed.
As the scope of the elements to be printed and the settings for archiving are usually not changed that often, you can now define these settings in sub-palettes. The Select layouts dialog box is now the only dialog box that is available for selecting the layouts to be output. As a result, the two tabs - Printer and Print profile - combine the most important settings, which are sorted by logical groups.
The new layout output clearly reflects the completely revised output philosophy, which consists of the following three steps:
- Setting up the page
This step involves setting up the actual layout. The aim is to define it exactly as you want to output it later. By defining the page, for which you can specify any size, you define the layout area. By setting the margins, you specify whether the layout is to be exported as a PDF file, printed on a large-format printer using a roll or printed to a single sheet using a normal printer.
If you have not yet selected the layout border and title block as properties of the page, you can place these elements now using the  Layout Border as well as
  Label or
  Legend, Title Block tools.
 - Assembling the layout
This step involves placing the layout elements as documents or filesets in the layout area within the layout border. If you want, you can also place additional text, dimension lines and design elements. - Outputting the layout
This step involves printing the finished layout using Print Layouts and/or creating a PDF file of the layout using  Export PDF Data. By using print profiles, you can change the look of the final printout without changing the actual layout.
Using the Print Layouts tool, you can select the output device and - if you are using Windows drivers - its printable area, which results from the paper format minus the device margins. Depending on the margins set in  Set Up Page, the layout area is placed at the bottom left corner of the printable area or at the bottom left corner of the paper format.
Unlike the layout area, the size of the paper format is not freely definable. The sizes that are actually available to you depend on the output device set. The elements that are within the printable area of the layout page and output device are included in the printout. The following options are available for choosing the paper format that is appropriate to the layout area:- Open the
 Options on the Layout page and select the When setting up page - adjust device (printer) option if you want the program to automatically choose the paper format and its orientation in accordance with the page.
 - Open the Print Layouts tool on the Printer page. In the Settings area, click the
 Select paper format (printer) based on page format icon next to Format if you want to manually adjust the paper format and its orientation to the page.
